1″ Apollo RPLF4A: How To Repair

I am repairing a 1” Apollo RPLF4A. Are there any special tools I will need to complete the job?
The RP4A is Apollo’s newest version of a reduced pressure principle assembly. We have fielded a few calls on these particular assemblies and just wanted to help with the repair procedures on this model. You will notice that the outward appearance somewhat resembles Conbraco’s earlier 40-200 series, but the internal components are completely different. One of the main differences that affect the repair of this assembly is that the check valve assemblies are self-contained modules. That means that the seat, poppet, spring, and spring retainer are one component.
Mark:
The Conbraco/Apollo RPLF4A is a reduced pressure principle assembly. Production of this assembly began in 2011. The body of the Apollo RPLF4A is made of lead-free bronze. The standard version of this model (RP4A) looks very similar in construction, but the body is made of a leaded bronze. The repair procedures are the same for both models. This model uses poppet style check modules with a top entry design. There are no special tools are necessary to replace the check valve seats and relief valve seats.
Doug:
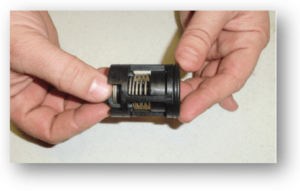
The check covers are threaded into the body and sealed with an o-ring. Loosen the covers by turning them counterclockwise. The check valve springs are contained so there is no spring load on the covers. The check valve modules are o-ring sealed and pushed into the body. The module can be removed by simply pulling it straight out of the body. To release the spring tension, hold the spring retainer firmly as you push down and turn 90 degrees in either direction. At this point the spring and poppet are free from the seat cage.
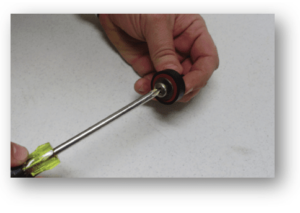
The check valve disc is accessible by removing the retaining screw and washer from the plastic poppet. The check seat cage is part of the module, so if it is damaged then the module will need to be replaced.
Mark:
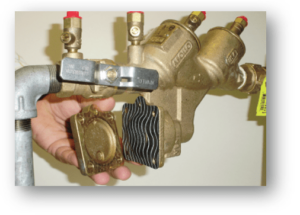
The relief valve of the Apollo RPLF4A is located on the bottom of the assembly. The relief valve cover is sealed by the diaphragm and has a slight spring load. Once the cover bolts are removed, the diaphragm and cover are free. The RV assembly is o-ring sealed and can be pulled straight out of the body. The RV seat is sealed by an o-ring and can be removed by pulling it straight out of the body.
Doug:
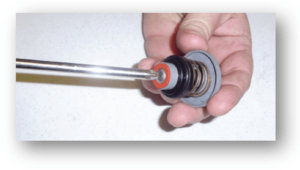
To replace the RV disc, simply remove the retaining screw and washer from the front of the stem. The relief valve assembly is spring loaded and must be disassembled to replace the stem o-ring. To do this, hold the stainless diaphragm plate firmly and remove the retaining screw.
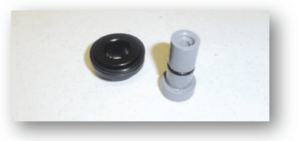
Once the retaining screw is removed, the spring, stem and bushing are free. The stem o-ring should be replaced and lubricant applied. Reassemble the RV assembly in reverse order.
Check out our latest YouTube video regarding the full repair of the Apollo RP4A
