
1″ Febco 860: How To Repair

I have a 1″ Febco 860 reduced pressure principal assembly that is dripping from the relief valve and needs to be repaired. Can you give me some information on how to replace the diaphragm and seat disc for this particular relief valve?
Mark:
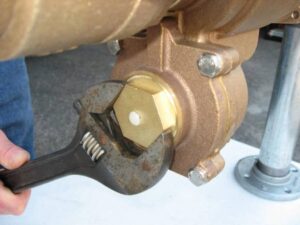
If you are not familiar with how to repair the relief valve on the 1″ Febco 860, it can be a little tricky the first time. Before we get started, it is important to remember that discharge from the relief port does not necessarily indicate that there is a problem with the relief valve. Many times, you will find that the discharge is an indication of a failed #1 or #2 check valve. It is always a good idea to trouble shoot the assembly first to verify the problem. Now that we have determined that the relief valve needs service, go ahead and close the inlet and outlet shutoff valves and bleed off the water pressure.

Doug:
The relief valve on the 1″ Febco 860 is located on the bottom of the assembly. The access cover for the RV has what looks like a brass nut that is located in the center of the cover. Loosen this nut by unscrewing 1/4 turn counterclockwise. Then you can go ahead and remove the relief valve cover bolts (2) and access cover. The relief valve on this assembly is unique in that the RV module is attached to the access cover. The RV module has a large diaphragm that you can see and a smaller inner diaphragm that is attached to the access cover.
To remove the RV module from the cover, simply unscrew and remove the brass nut on the cover. Now you can grab the large diaphragm and module and pull away from the cover until the small diaphragm comes out through the hole in the cover.
Mark:
Now that you have separated the module from the cover on the Febco 860, you can disassemble the module and replace the rubber parts. The RV spring is separate from the RV module. There is an Allen screw located in the center of the module that holds it together. This screw must be removed in order to replace the seat disc and both diaphragms. You will notice that there are white plastic slip rings on either side of the small diaphragm that should be replaced. The relief valve seat is black plastic and located inside the body of the assembly. The RV seat simply slides into place and is sealed by a thin gasket that may need to be replaced. Be sure not to forget there is a small sensing line o-ring at the top of the RV cover.


Doug:
Once you have replaced the rubber parts of the 1″ Febco 860 module you are ready to reassemble the module into the RV cover. You must shape the small diaphragm so that it forms a “tulip” shape.


It can then be inserted into the RV cover. Make sure the two white slip rings are in place (one on either side of RV cover protecting the small diaphragm). A thin coat of food grade grease will help to hold them in position. Make sure the small diaphragm is not creased or folded under the slip ring. Now you can screw (hand tight) the large brass nut into the cover. This will hold the module in place. The large diaphragm can now be formed. Make sure the bead on the large diaphragm is seated in the groove on the cover. The module and cover are now ready to be installed on the assembly. The RV spring will be held in place between the module and the RV seat.