
Wilkins 350: How To Repair
I have run into a few of the ¾”-1” Wilkins 350 backflow assemblies. I have tested them but have not had to go inside to clean or repair one as of yet. I wanted to get some general information on these units and find out what to expect if one needs to be repaired?
Doug:
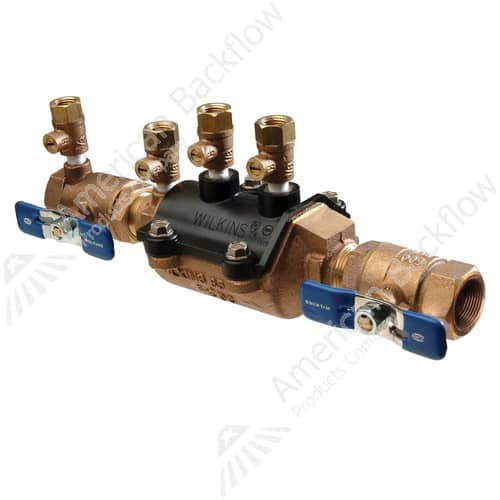
As many of you out there are probably aware, Wilkins has come out with the 350/375 series. The Wilkins 350 is the double check valve assembly. The model 375 is the reduced pressure principle assembly. As you can see from their outward appearance they have changed the design to incorporate a removable plastic “vessel” or body. The idea behind the removable plastic vessel is to make it easier to winterize the assembly by being able to remove the wetted components between the shut off valves. It was also designed to make repairs or change outs quick and easy.
Mark:
In this article we will talk about how to repair the Wilkins 350 double check series. We will discuss the 375 RPZ in next month’s article. The 3/4 inch and 1 inch Wilkins 350 utilize the same vessel and internal components so the repair will be the same for both. The first thing you will notice is that there are four bolts that secure the vessel into the bronze body or “cradle”. You will need to remove the four bolts with a 3/8” socket.
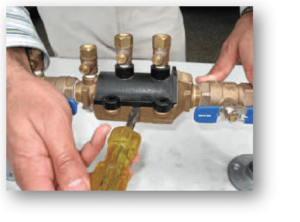
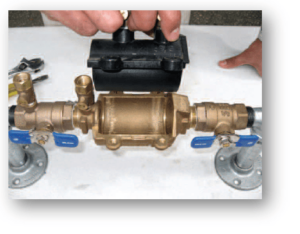
Once the bolts are removed, you will be able to pull the vessel from the body. If it does not come out easily, there is a screwdriver slot on the side that can be used to pry the vessel out of the cradle. Now we can concentrate on removing the checks. You will need to slide both check modules out of the body.
Doug:
Once you have the check modules removed, we can now take them apart to clean or replace the rubbers. Although the check valve #1 and #2 look different, they will disassemble the same way.
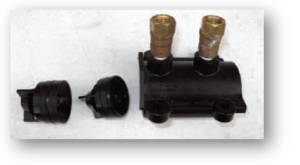
You will need a screwdriver to slip into the slot on the side of the checks, which is located between the check seat and “sleeve”. The module is spring loaded, so be careful and hold the module securely as you gently pry the two pieces apart. There is nothing worse than to have a piece fly away from you.
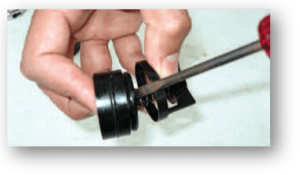
The rubber and poppet make up one single unit so if the rubber is damaged, the poppet will need to be replaced. Make sure to examine the check seat for damage in which case you will have to replace the whole check module.
Mark:
After you have cleaned or replaced the poppet for the Wilkins 350, the check seat and sleeve will “pop” back by simply pressing the two pieces together. Make sure to lube the check O-rings as they must be able to slide into the vessel smoothly. Make sure the inside walls of the vessel are clean so that the checks will be able to slide in easily. The #1 check should be labeled on the seat and you will slide the labeled end in so that the seat is facing up stream. The #2 check will slide in with the check seat facing the inlet also. Once both checks are in you can return the vessel into the body. Make sure that the O-rings on either end of the vessel are in place and lubricated. The vessel is designed to fit only one way and should slide easily into the body. Remember that the vessel is O-ring sealed, so there is no need to over tighten the vessel retaining bolts.